For Residents
Set up your rent payments
A step-by-step walkthrough of the resident portal, from your invitation email to your first automatic payment — with real screenshots at every step.
Setup, step by step
From invitation to your first payment.
-
1. Open your invitation email
You'll receive a personal email invitation when your lease begins, or when your building joins the platform. The link is unique to you — there's nothing to sign up for on your own.
-
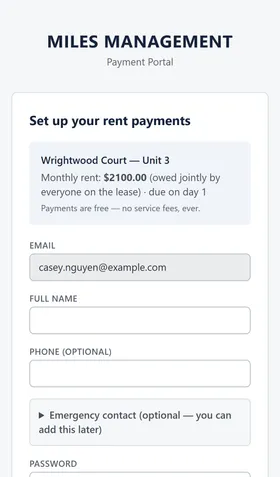
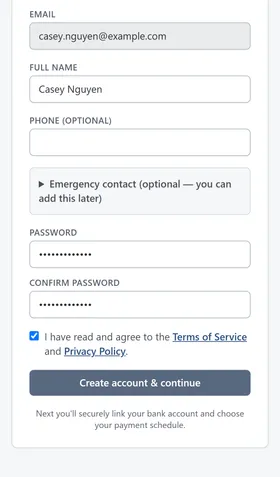
2. Create your account and accept the terms
Enter your name and choose a password. You can also add a phone number and emergency contact — both optional, and you can fill them in later from your profile. Checking the agreement box confirms you accept the Terms of Service and Privacy Policy before continuing.
-
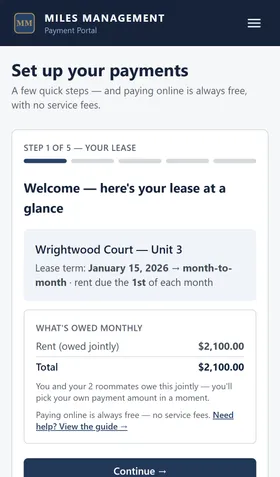
3. Review your lease at a glance
Step 1 of the setup wizard shows your property, unit, lease term, due date, and what's owed each month. On a jointly-owed lease shared with roommates, this is the full rent — you'll choose your own personal payment amount in a moment.
-
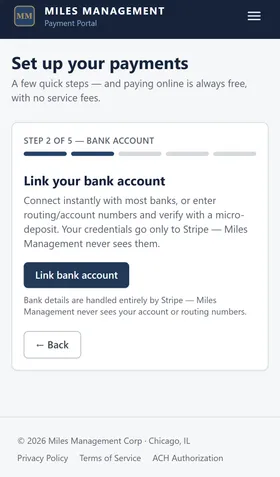
4. Link your bank account
Step 2 connects your bank through Stripe, our payments processor. Most banks link instantly; if yours doesn't, Stripe sends two small test deposits (a few cents) to verify the account — you'll enter the code from your bank statement a day or two later. Either way, your login credentials and account number are visible only to Stripe, never to Miles Management.
-
5. Choose autopay or one-time payments
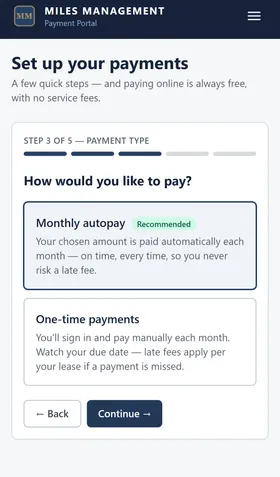
Step 3 asks how you'd like to pay: automatic monthly autopay (recommended — it's the surest way to avoid a late fee), or manual one-time payments you initiate yourself each month from your dashboard. You can switch between the two any time from the Payments page.
-
6. Pick your payment day and amount
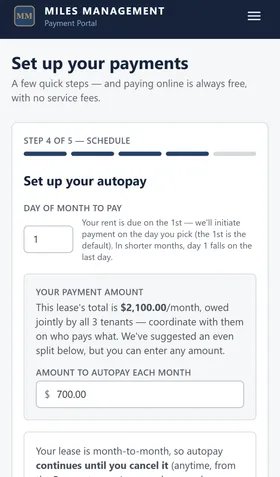
Step 4 sets the day of the month autopay initiates (it defaults to your due date). If your lease is shared and owed jointly, you'll also see a suggested even split across everyone on the lease — coordinate with your roommates, then enter whatever amount you've agreed to pay; it's never locked to the suggestion.
-
7. Review and authorize
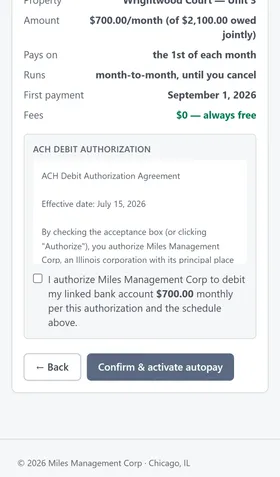
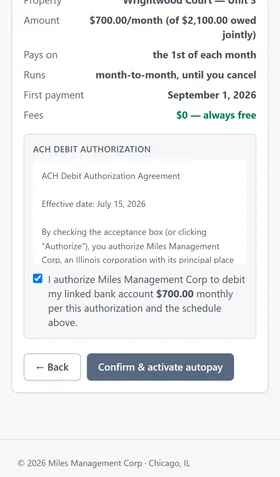
Step 5 summarizes everything — amount, payment day, schedule window, and your first payment date — before you commit. Scroll the ACH authorization text and check the box to confirm you're authorizing Miles Management to debit the amount and schedule shown.
-
-
8. What happens next
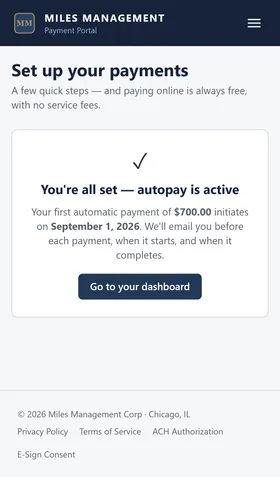
You're set. If you chose autopay, you'll see your first payment date right away, and Miles Management emails you before each payment initiates, when it starts, and when it completes — ACH transfers typically take a few business days to settle. If you chose manual payments, use Pay Now on your dashboard each month instead.
Once you're set up
Maintenance requests and your lease.
-
Submitting a maintenance request
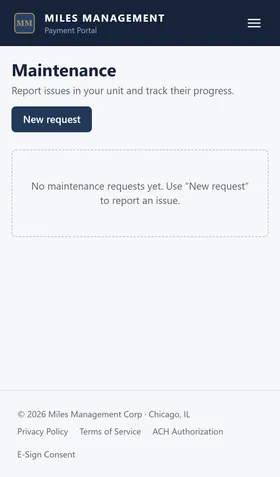
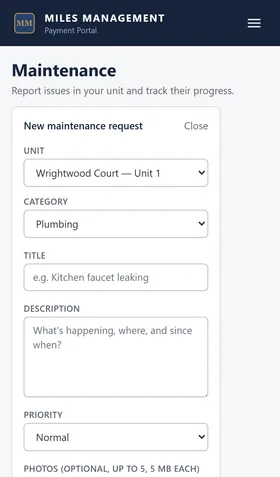
From your dashboard, open Maintenance and describe the issue — add photos if it helps. Your request goes straight to the maintenance coordinator, and you can track its status until the work is done. For a real emergency (fire, flooding, gas), call 911 or the office directly instead of using the portal.
-
-
Viewing your lease
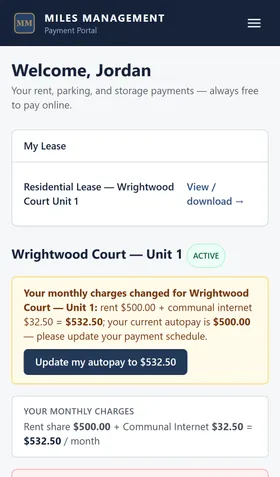
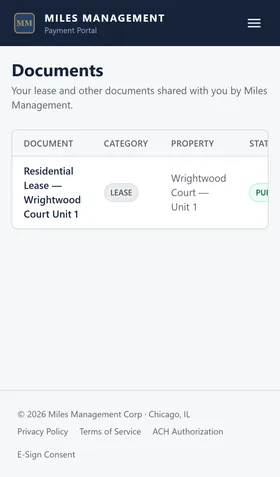
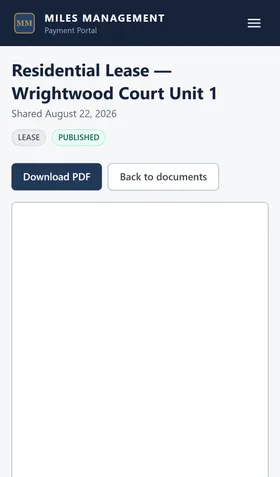
Your dashboard shows a My Lease card linking straight to your signed lease document whenever one has been uploaded — view or download it any time. The full list, alongside any amendments or notices, is always available from Documents.
-
-
Still have questions?
We're glad to help.
For a broader overview and frequently asked questions — cost, security, roommate splitting, failed payments — see the Resident Guide. For anything else, email us at help@milesmgt.com and a person, not a ticket queue, will reply.
Ready to pay rent the easy way?
If you’ve received your portal invitation, sign in to link your bank, set up autopay, and manage your lease online.